
This is a follow up of my previous tutorial series on How to build ionic XMPP Chat client. Here we will be integrating chat client with online XMPP servers. We will also cover inband registration. So lets get started.
Free XMPP server used here is jabberpl.org
[wpi_designer_button text=’Download – advanced ‘ link=’https://github.com/arjunsk/XMPP-Chat-Client-Remote’ style_id=’48’ icon=’github’ target=’_blank’]
OR
[wpi_designer_button text=’Download – basic ‘ link=’https://github.com/arjunsk/XMPP-Chat-Client-Remote2′ style_id=’48’ icon=’github’ target=’_blank’]
What New:
- Supports remote XMPP server.
- In band Registration to remote XMPP server.
- Better implementation for Chat Logs.
So lets get started.
Register Page:

First of all include strophe.register.js into your strophe’s library folder.
Now include this library inside index.html
	<!--Strophe Register -->
	http://lib/strophe/register/strophe.register.js
controller.js –> registerCtrl
.controller('registerCtrl', function($scope , $state , sharedConn   ) {

	$scope.goToLogin=function(){
		$state.go('login', {}, {location: "replace", reload: true});
	}
	$scope.reg=function(r){
		r.domain="jabberpl.org";  // you can comment it if you want
		sharedConn.register(r.jid,r.pass,r.domain);
	}


})
services.js –> SharedConn
	SharedConnObj.register=function (jid,pass,domain) {
		//to add register function
		SharedConnObj.connection = new Strophe.Connection("https://conversejs.org/http-bind/");

		var callback = function (status) {
			if (status === Strophe.Status.REGISTER) {
				// fill out the fields
				SharedConnObj.connection.register.fields.username = jid;
				SharedConnObj.connection.register.fields.password = pass;
				// calling submit will continue the registration process
				SharedConnObj.connection.register.submit();
			} else if (status === Strophe.Status.REGISTERED) {
				console.log("registered!");
				// calling login will authenticate the registered JID.
				SharedConnObj.connection.authenticate();
			} else if (status === Strophe.Status.CONFLICT) {
				console.log("Contact already existed!");
			} else if (status === Strophe.Status.NOTACCEPTABLE) {
				console.log("Registration form not properly filled out.")
			} else if (status === Strophe.Status.REGIFAIL) {
				console.log("The Server does not support In-Band Registration")
			} else if (status === Strophe.Status.CONNECTED) {
				// do something after successful authentication
				$state.go('tabsController.contacts', {}, {location: "replace", reload: true});
			} else {
				// Do other stuff
			}
		};

		SharedConnObj.connection.register.connect(domain, callback, 60, 1);
	};
register.html
<ion-view style="" id="page7" title="Register" hide-back-button="true">
    <ion-content class="has-header" padding="true">
        <form style="" class="list">
            <ion-list style="">

                <label style="" class="item item-input">
                    <span class="input-label">Jabber ID</span>
                    <input ng-model="register.jid" placeholder="username" type="text">
                </label>

				<label style="" class="item item-input">
                    <span class="input-label">Password</span>
                    <input ng-model="register.pass" placeholder="password" type="password">
                </label>

				<label style="" class="item item-input">
                    <span class="input-label">Domain</span>
                    <input ng-model="register.domain" placeholder="jabberpl.org" type="text">
                </label>

			</ion-list>
            <div style="height: 40px;" class="spacer"></div>

			 <button  class="button button-stable button-block "  id="register-button" ng-click="reg(register)" >Register</button>


			 <button  class="button button-stable button-block "  id="login-button" ng-click="goToLogin()" >Login</button>


			</form>
    </ion-content>
</ion-view>
LOGIN
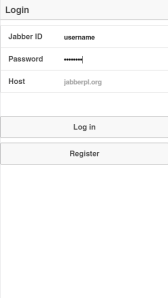
To handle login to a remote XMPP server, we need to get the corresponding BOSH_SERVICE_URL and PORT number. We can get the respective url and port number by setting BOSH_URL as https://conversejs.org/http-bind/
login.html
<ion-view style="" id="page5" title="Login" hide-back-button="true">
    <ion-content class="has-header" padding="true">
        <form style="" class="list">
            <ion-list style="">

                <label style="" class="item item-input">
                    <span class="input-label">Jabber ID</span>
                    <input ng-model="user.jid" placeholder="username" type="text">
                </label>

				<label style="" class="item item-input">
                    <span class="input-label">Password</span>
                    <input ng-model="user.pass" placeholder="password" type="password">
                </label>

				<label style="" class="item item-input">
                    <span class="input-label">Host</span>
                    <input ng-model="user.host" placeholder="jabberpl.org" type="text">
                </label>

			</ion-list>
            <div style="height: 40px;" class="spacer"></div>

			 <button  class="button button-stable button-block "  id="login-button" ng-click="login(user)" >Log in</button>

			 <button  class="button button-stable button-block "  id="register-button" ng-click="goToRegister()" >Register</button>

			</form>
    </ion-content>
</ion-view>
control.js –> loginCtrl
.controller('loginCtrl', function($scope , sharedConn,$state ) {

	var XMPP_DOMAIN  = 'jabberpl.org'; // Domain we are going to be connected to.
	var xmpp_user    = 'username';     // xmpp user name
	var xmpp_pass    = 'password';

	$scope.goToRegister=function(){
		$state.go('register', {}, {location: "replace", reload: true});
	}


	//sharedConn.login(xmpp_user,XMPP_DOMAIN,xmpp_pass);  // To automate login

	$scope.login=function(user){
		sharedConn.login(user.jid,XMPP_DOMAIN,user.pass);
	}

})
service.js –> sharedConnService
SharedConnObj.BOSH_SERVICE = 'https://conversejs.org/http-bind/';
BETTER CHATLOGS:
Earlier we were only taking distinct jabber_id from the from_id column of chats to output in the chat-log. This was ineffective as you cannot get the jabber_id’s from to_id. I have modified the SQL to take distinct values from from_id and to_id.
//Better implementation
		var query = "SELECT logtable.logid FROM ( SELECT from_id as logid FROM chats UNION SELECT to_id as logid FROM chats )logtable where logid not like ? ";

        $cordovaSQLite.execute($rootScope.db, query,[my]).then(function(res) {
            if(res.rows.length > 0) {
				for (var i=0 ; i<res.rows.length; i=i+1) {
					sqlObj.chatlogs.push({
						id: res.rows.item(i).logid,
						name:  res.rows.item(i).logid,
						lastText: 'Last Text',
						face: 'img/ben.png'
					});
                }

            } else {
                console.log("No results found");
            }
        }, function (err) {
            console.error(err);
		});
Now we are ready to go.
Please note that in order to run XMPP client with SQL, you need to use Chrome Web Browser. It supports WebSQL and your messages are stored in the Browsers local webSQL database.
You can also download my XMPP client without SQL to test it on other browser.
Please follow me on GitHub to get the latest updates.

Very good your tutorial. I’m using openfire and server is working.
My problem is that I am using XDK build intel. Sqlite plugin that u pointed out does not work with Cordova 6.0.0. I’m using updated version.
In the emulator everything seems right, but when installed the device for some reason shows an error and does not open app.
Can help me? sorry my english
LikeLike
Hello @juniorandriolo:disqus ,
I am really sorry. I couldn’t fix that bug. In-fact i am also having the same issue.
Please do share, if you figured out the solution.
LikeLike
Thanks!
LikeLike
How to get and show archived messages. I’ve enabled message archive on my server but I don’t know how to fetch and show those messages.
Please help.
LikeLike
Actually I haven’t looked deep into this. In my implementation, I store the messages in my local database (using sqlLite) for demo purpose. I think you should google for the same or open a question on stackoverflow.
LikeLike